Some Windows 10 users have been complaining about disconnecting issues with their Wi-Fi. The issue here is that the Wi-Fi detects an available Wireless Network and it gets connected but for some reason, it gets disconnected and does not reconnect automatically. The issue can be caused by corrupted/outdated wireless drivers, power management issues, home network marked as Public. In this article, I’ll be showing you 8 Ways To Fix Wi-Fi keeps disconnecting in Windows 10. Without wasting much of our time, let me show you 8 Ways To Fix Wi-Fi keeps disconnecting in Windows 10.
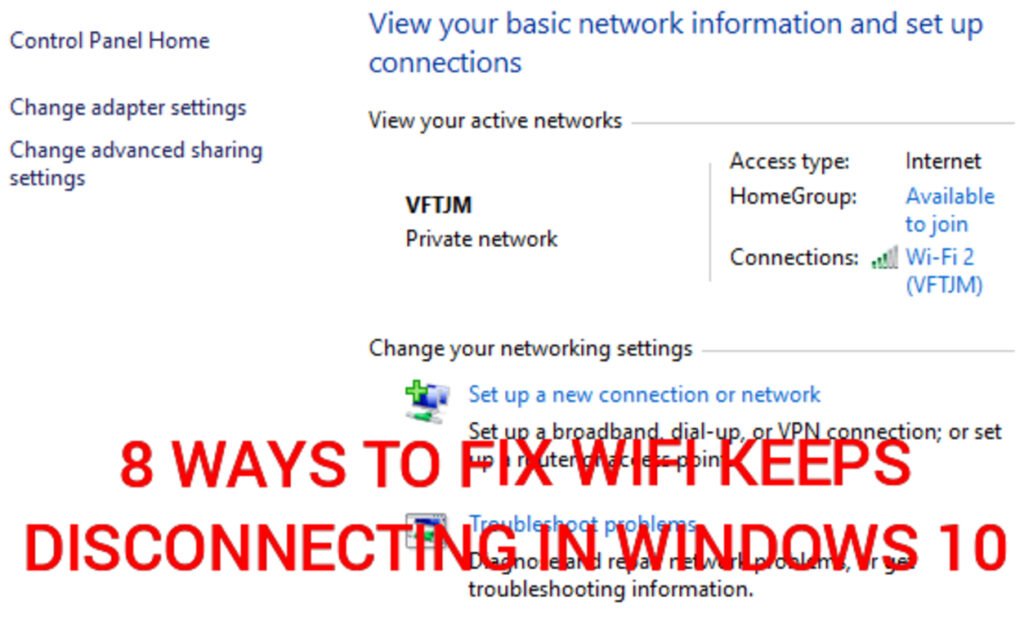
Method 1: Disable 802.1 1n Mode
Step 1: Go to Network and Sharing Center and select your WiFi under your active network.

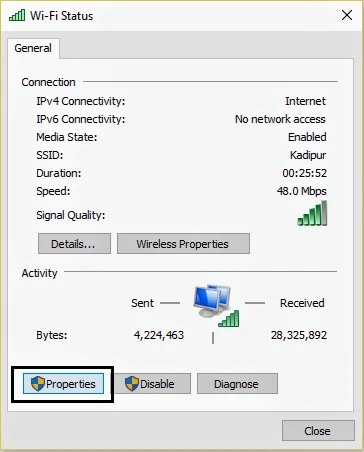
Step 2: Now, click on Properties.
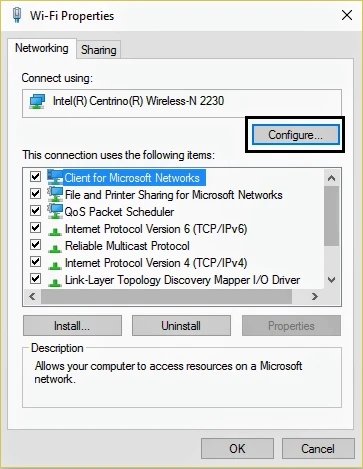
Step 3: Click on Configure.
Step 4: Go to Advanced tab and then select 802.11n Mode and from the value drop-down select Disabled.
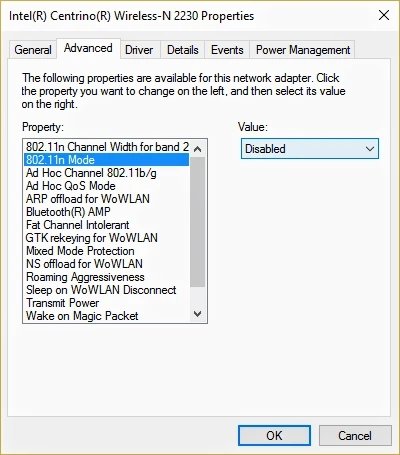
Step 5: Click Ok and restart your PC to save changes.
This should fix WiFi keeps disconnecting in Windows 10. However, if the issue persists then follow the next method.
Method 2: Resolve Power Management Issues
Step 1: Go to Device Manager by pressing Windows Key + R then type “devmgmt.msc” (without quotes) and hit Enter.

Step 2: Expand “Network adapters” and then right-click on your installed network adapter then select Properties.

Step 3: Go to Power Management Tab and uncheck “Allow the computer to turn off this device to save power“.
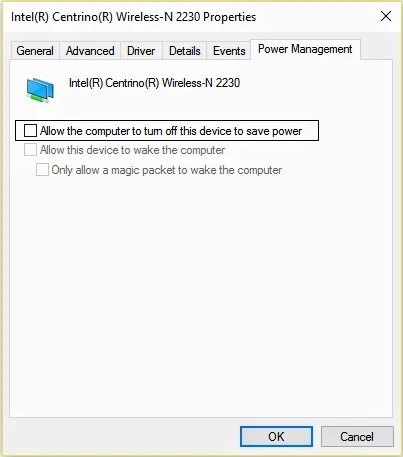
Step 4: Click Ok and restart your PC.
Method 3: Turn Off Wi-Fi Sense
Step 1: Go to Windows Settings and then click on Network and Internet.

Step 2: From the left-hand menu, select Wi-Fi and disable everything under Wi-Fi Sense in the right window.
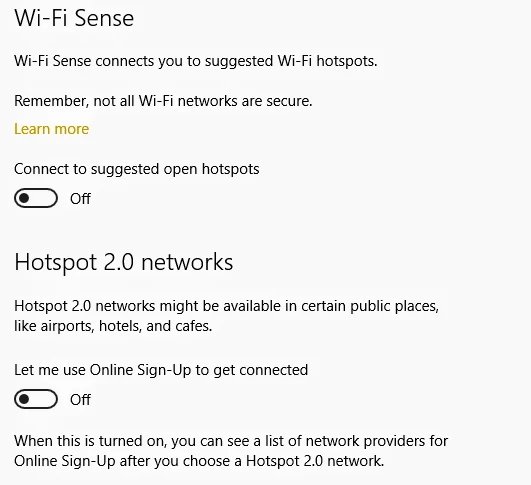
Step 3: Also, disable Hotspot 2.0 networks and Paid Wi-Fi services.
Step 4: Now, disconnect your Wi-Fi network and reconnect it again.
This should already fix Wi-Fi keeps disconnecting in Windows 10. But if the issue persists follow other methods below.
Method 4: Reset TCP/IP Configuration
Step 1: Go to Command Prompt (Admin) by right-clicking on the Windows button.

Step 2: Type the following commands one after another and press Enter after typing each of the commands:
• ipconfig /release
• ipconfig /renew
• netsh winsock reset
• netsh int ip reset
• ipconfig /flushdns
• ipconfig /registerdns

Step 3: Restart your computer to save changes and you’re good to go.
Method 5: Reset Network Connection
Step 1: Go to Windows Settings and then click on Network and Internet.

Step 2: Select Status from the left-hand menu.
Step 3: Scroll down to the bottom and click on Network reset.
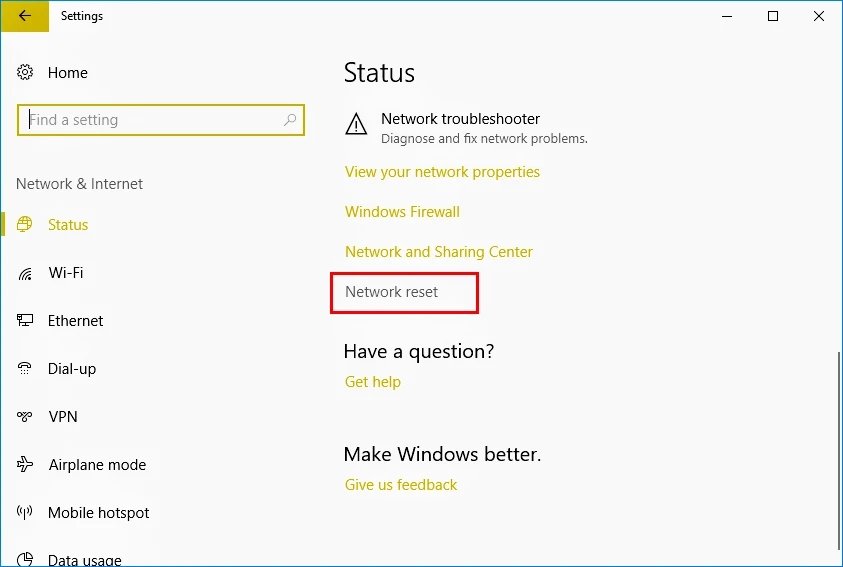
Step 4: Click Reset now in the Network reset section.

Once this is done, it will reset your network adapter and once it is complete, the system will be restarted. This helps to fix Wi-Fi keeps disconnecting in Windows 10 but if the issue persists, follow the next method.
Method 6: Change Channel Width
Sometimes, changing channel width helps you to fix Wi-Fi keeps disconnecting in Windows 10.
Step 1: Press Windows Key and R simultaneously then type “ncpa.cpl” (without quotes) and hit Enter to open Network Connections.

Step 2: Right-click on your current Wi-Fi connection and then select Properties.
Step 3: Click on the Configure button.

Step 4: Go to Advanced tab then select the 802.11 Channel Width.
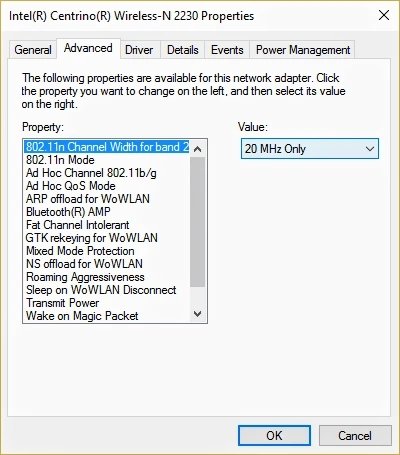
Step 5: Change the value of the Channel Width to Auto and then click Ok and restart your computer to save changes.
Method 7: Run Network Troubleshooter
Step 1: Go to Windows Settings and click on Updates and Security.

Step 2: Select Troubleshoot from the left-hand side menu.
Step 3: Click on Internet Connections and then click Run the troubleshooter and follow further on-screen instructions.

Step 4: If the above step didn’t work, Go back to the Troubleshoot window and click on Network Adapter then click Run the troubleshooter.
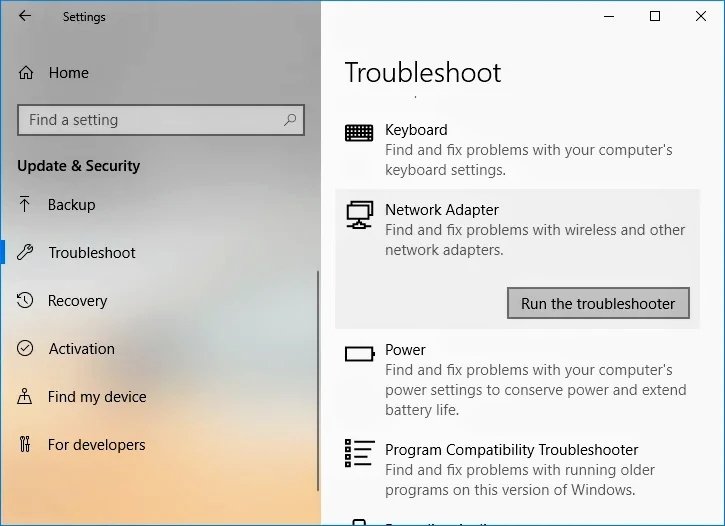
Step 5: Restart your computer to save changes and see if you can fix Wi-Fi keeps disconnecting in Windows 10.
Method 8: Reinstall Wi-Fi Adapter Driver
If you are still facing the Wi-Fi disconnecting issue then you need to download the latest drivers for Wi-Fi Adapter and install it on your PC.
Step 1: Go to your manufacturer’s website and download the latest Network Adapter drivers for Windows 10.
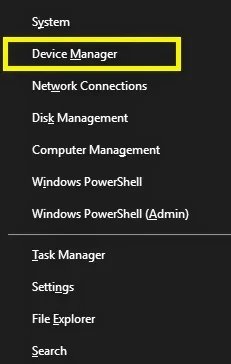
Step 2: Go to Device Manager (by pressing Windows Key + X and selecting Device Manager).
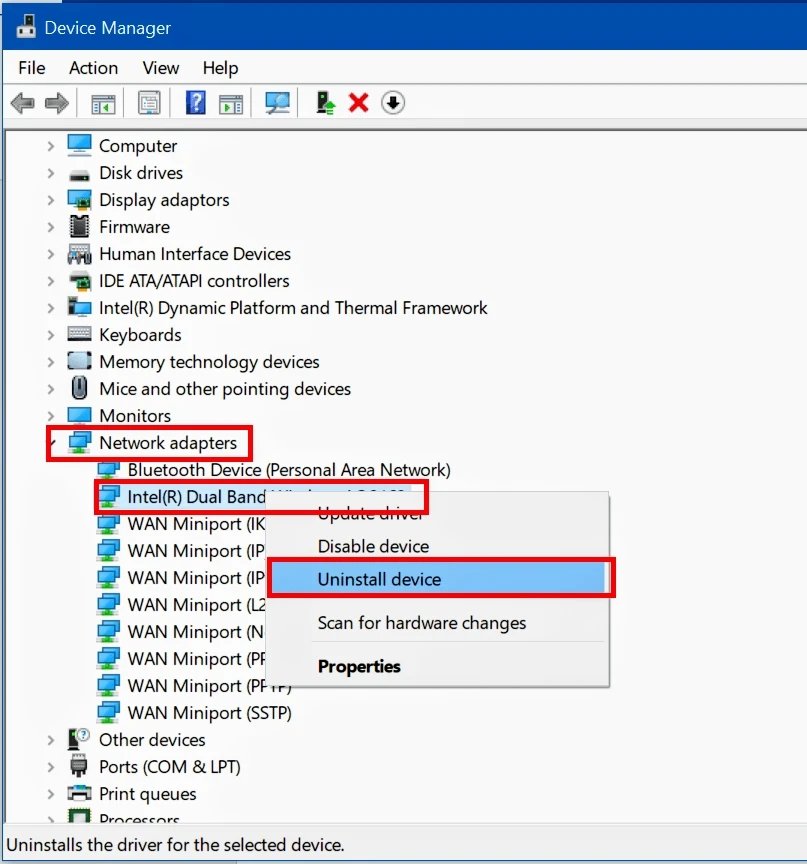
Step 3: Expand Network adapters and right-click on your Wi-Fi adapter and click on Uninstall device.
Step 4: Checkmark “Delete the driver software for this device” in the prompt that shows up and click Uninstall.

Step 5: Now, run the setup file you downloaded as an Administrator and finish the setup process with defaults and the new drivers will be installed. Restart your PC afterward to save changes.
I hope you have successfully fixed Wi-Fi keeps disconnecting in Windows 10. If you have any questions, do well to ask us in the comments section below.


