Check Disk Utility can help you resolve some computer error/problems and it can also improve your computer performance by making sure your hard disk is error-free. CHKDSK is a command that shows the report for a disk and can correct any error found in the disk. In this article, I’ll be showing you how to run check disk utility (CHKDSK) to fix file system error. Checking disk utility is to make sure the disk is healthy. CHKDSK can be run as a command line or with a graphical user interface.
Run Check Disk Utility (CHKDSK) As Graphical User Interface
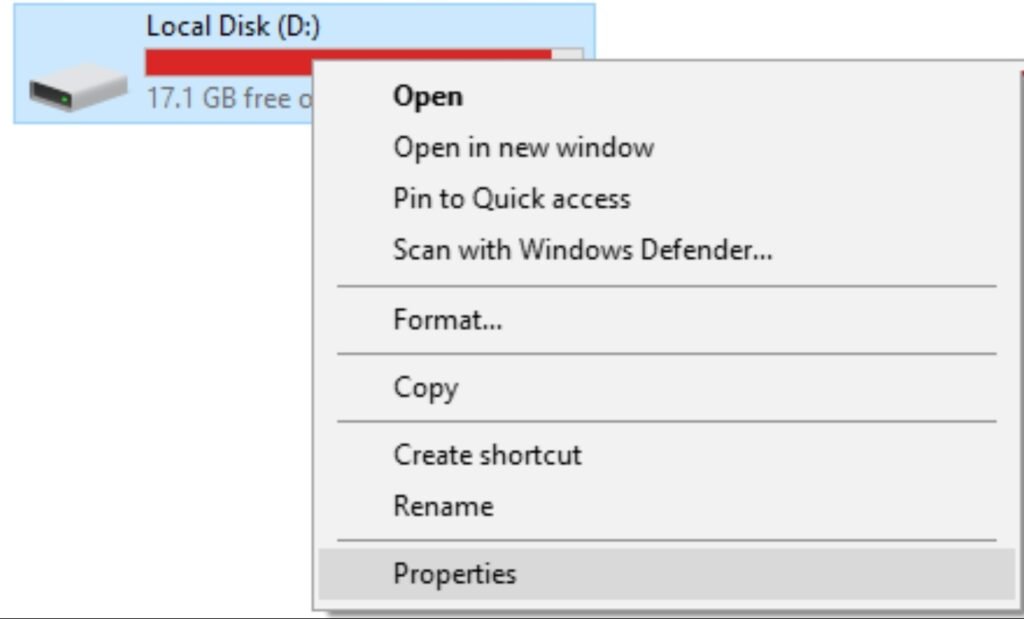
Step 1: Open Windows Explorer and right-click on the drive you want to run CHKDSK then select properties.

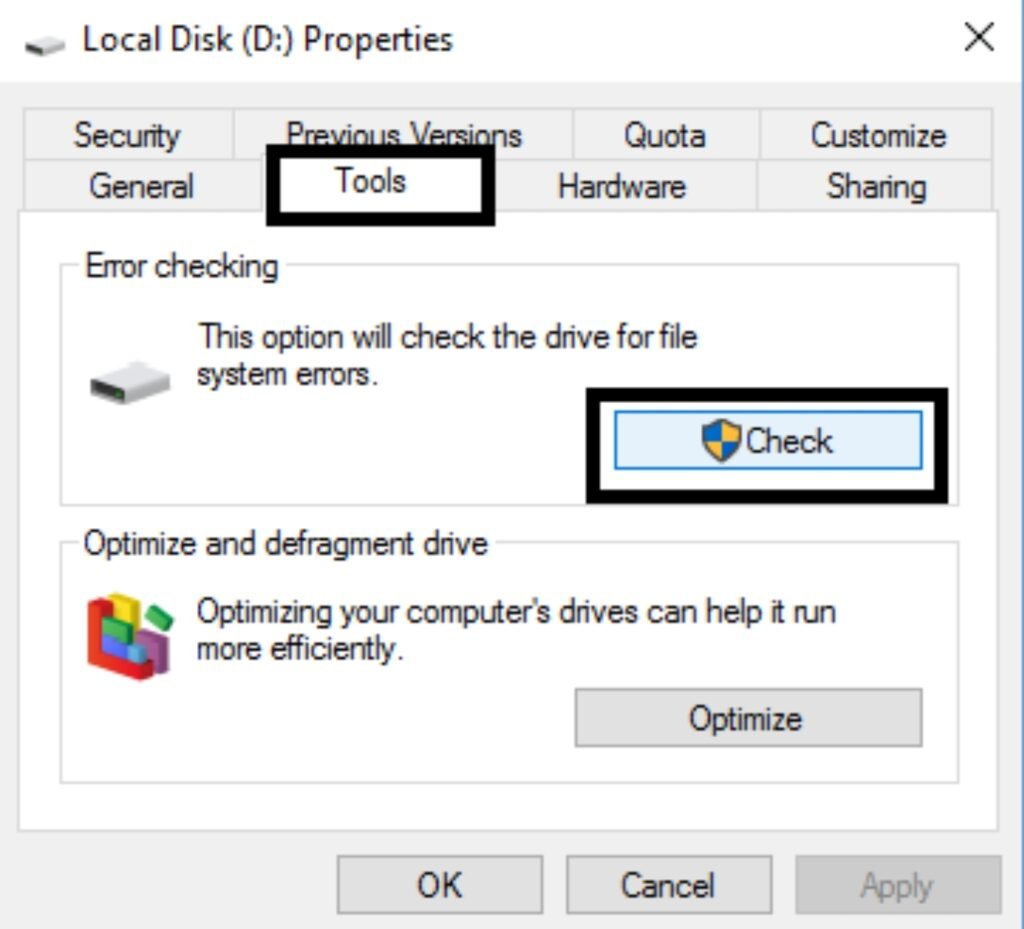
Step 2: In the properties, click on Tools, and under Error Checking, click the check button.

Note: Sometimes, CHKDSK can’t start because the disk you want to check is still being used by the system processes. So, CHKDSK will ask you to schedule check disk on the next restart. Checking disk can take up to an hour depending on the capacity of the disk.
Run CHKDSK With Command Prompt
Step 1: Right-click on the Windows button, then click on Command Prompt (Admin).

Step 2: In the cmd windows, type “CHKDSK /f /r” and press enter.
Step 3: You will be asked to schedule the scan in the next system reboot because of some system processes, type Y, and hit enter.

Once you’re done with any of the two methods, you have successfully fixed file system error with Check Disk Utility (CHKDSK). If you have any questions, comment below.


